
The Human Resources Management workspace is the main repository for managing employee IDs and data for budgeting Human Resources in your plan(s). You can use the HR Management screen to manage employee’s allocation within the organization as well as reallocate employees to different departments as required.
To open the HR Management screen for your entire organization:
1. With no Input Definition open for budget input, select the HR Management option from the Tools ribbon.

2. You
will be presented with the following screen: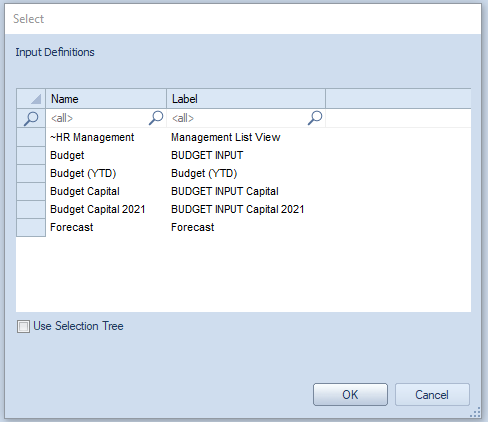
3. To view all employees defined within Prospero, select the ~HR Management item from the list. You will get the following screen:
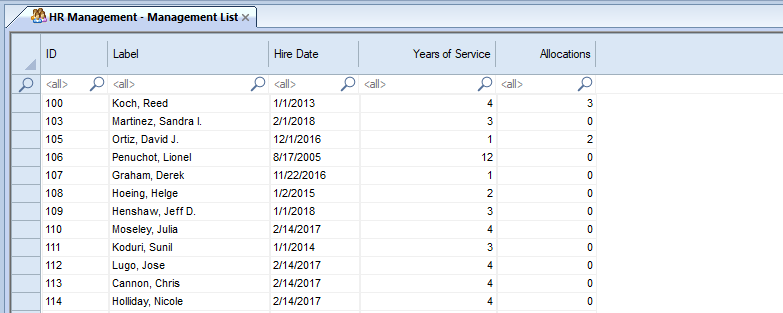
All employee records for the organization will be listed. Fields in the workspace include:
•ID – This is the ID assigned to the employee when the employee’s record was created in the plan.
•Label – This is the name of the employee entered when the employee’s record was created in the plan.
•Hire Date – This is the hire date for employee as reflected on the Data Input workspace Human Resources tab.
•Years of Service – This is a calculated value based on the hire date for employee defined on the Data Input workspace Human Resources tab.
•Allocations – This value reflects the number of allocations for the employee across the organization. This value is dependent on the value defined on the Pay Grade to which the user is assigned and which has been defined on the Input Definition Human Resources tab.
Use the top filter row to search
on criteria in your screen. You can search on any field where the magnifying
glass icon  appears:
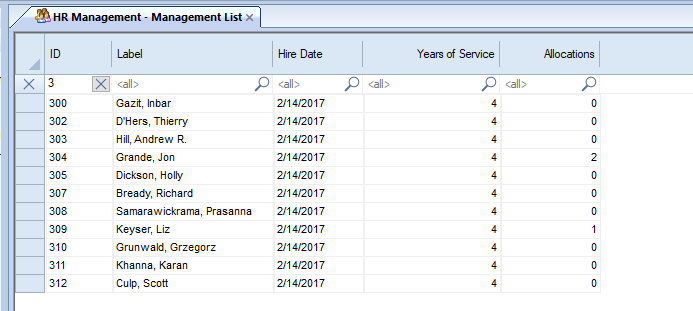
4. To view Employee Detail, select an employee record by double-clicking on the record row:
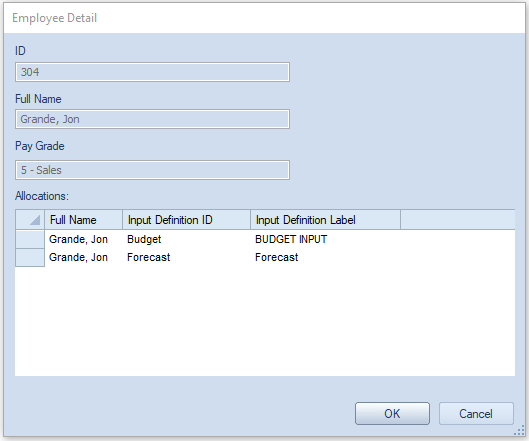
5. To close the HR Management screen, select the X next to “HR Management – Management List”.
To open the HR Management screen for a specific Budget:
1. Select the HR Management option from the Tools ribbon.

2. You
will be presented with the following screen:
3. Select the Input Definition for which you wish to see employees.
4. You will be presented with the following screen. All employee records for the select Input Definition will be listed.
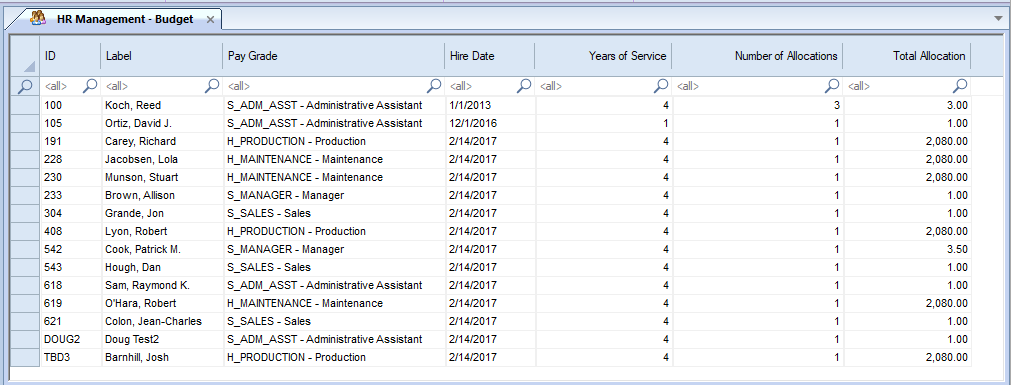
Fields in the workspace include:
•ID – This is the ID assigned to the employee when the employee’s record was created in the plan.
•Label – This is the name of the employee entered when the employee’s record was created in the plan.
•Hire Date – This is the hire date for employee as reflected on the Data Input workspace Human Resources tab.
•Years of Service – This is a calculated value based on the hire date for employee defined on the Data Input workspace Human Resources tab.
•Number of Allocations – This value reflects the number of allocations for the employee in the budget. This value is dependent on the value defined on the Pay Grade to which the user is assigned and which has been defined on the Input Definition Human Resources tab.
•Total Allocation – This value reflects the total number of allocations for the employee within the organization. This value is dependent on the allocation value assigned to the Pay Grade and which has been defined on the Input Definition Human Resources tab.
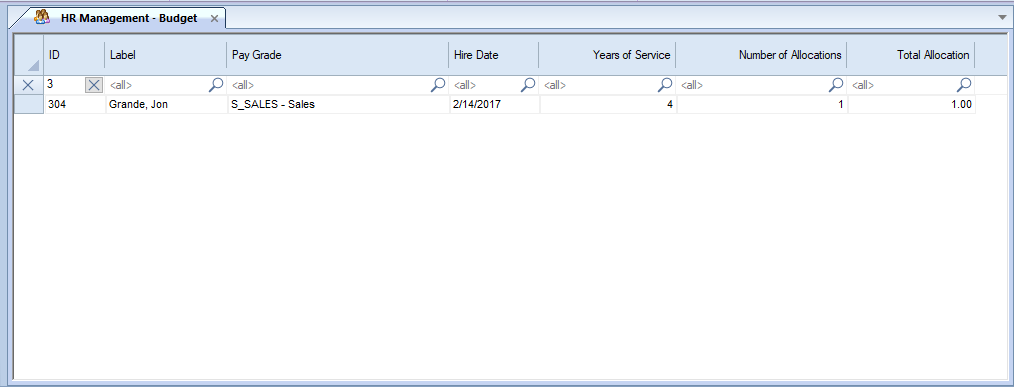
Use the top filter row to search
on criteria in your screen. You can search on any field where the magnifying
glass icon  appears:
5. To view Employee Detail, select an employee record by double-clicking on the record row:
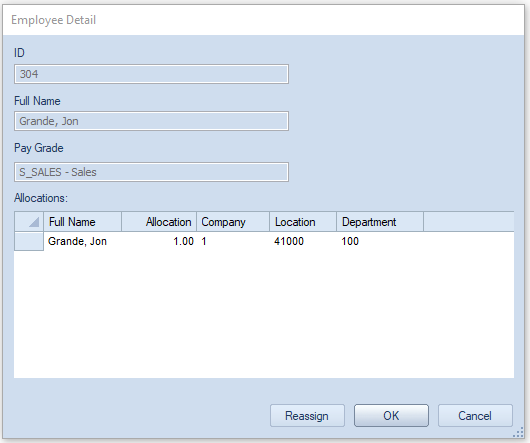
6. Manage the employee record detail as necessary. (Select the Reassign button to make any assignment changes.)
7. Select the Ok button to confirm any action or the Cancel button to cancel.
8. To close the HR Management screen, select the X next to “HR Management – <BUDGET NAME>”.
In either instance, you must have the Use Human Resources Management permission.