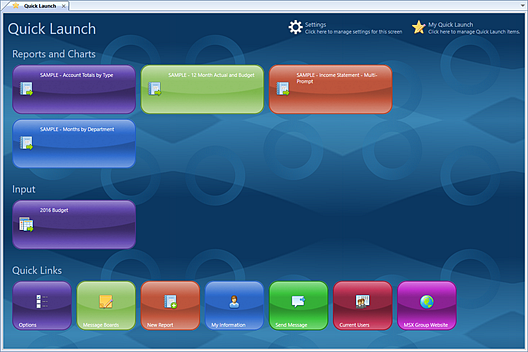

Note: The reports, report collections, input definitions and features available on this screen are dependent on your Permissions and Visibility settings in Prospero. For example, for Viewers, the “New Report” option will not be available. For additional information, see the sections on Permissions and Visibility.
To add reports and/or input definitions to your Quick Launch:
1. If your Quick Launch screen is open, click on the “My Quick Launch” icon in the upper right-hand corner.
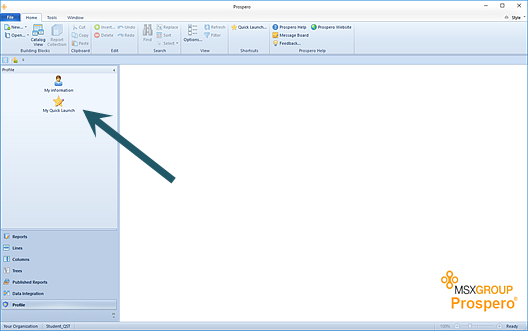
2. Otherwise, click on the Profile option in the Navigation Pane (or Security for Administrative-level users) and then select “My Quick Launch” icon.
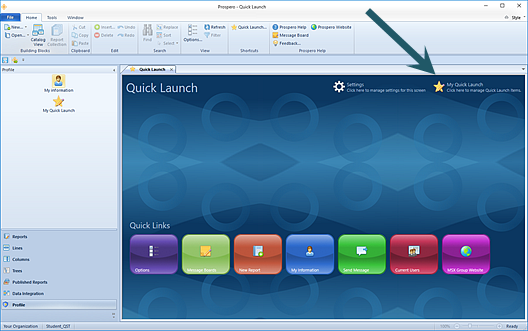
3. Select the “My Quick Launch” option at the top of the screen.
4. In the
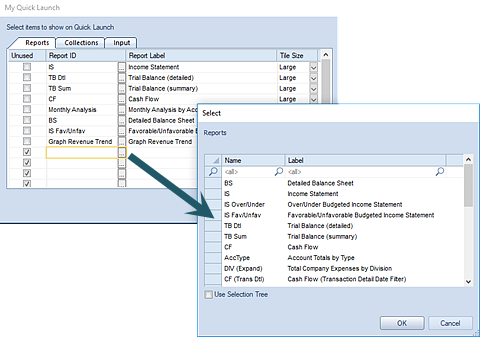
My Quick Launch dialog, type the name or use the ellipsis button to select an
existing report, report collection or input definition from a list on each
corresponding tab.

You can define up to thirty (30) reports, report collections and/or input definitions each, depending on how you have licensed Prospero.
You can also define the size of the tile by selecting either “Large” or “Small” from the Tile Size dropdown menu on the entry for the report, report collection or input definition.
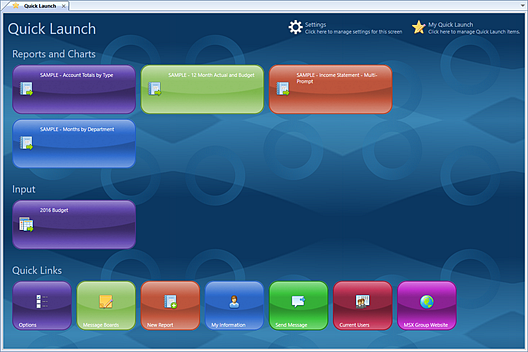
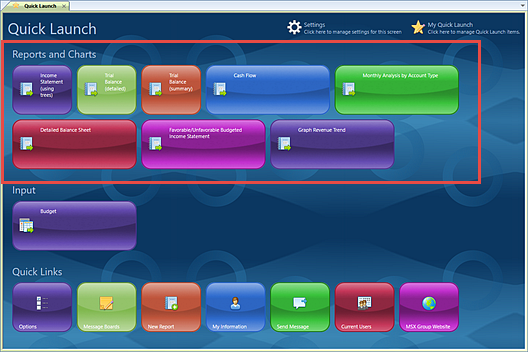
The tile size will be reflected on the screen:

5. When you have typed the name or selected the report, report collection or input definition, select Ok to confirm the new addition.
6. After selecting your desired items, your Quick Launch will refresh to show your added selection(s) listed by their label.
Whenever an item listed in the Quick Launch is renamed, this new name will be reflected on the Quick Launch screen automatically.
In addition, if a report or input definition is no longer needed, you can either change the item using the ellipsis button or select the “Unused” in the checkbox. The item will not appear when the Quick Launch is refreshed.
To configure your Quick Launch:
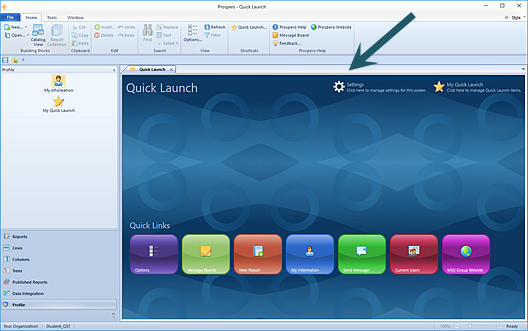
1. Select the Settings option on the Quick Launch screen.
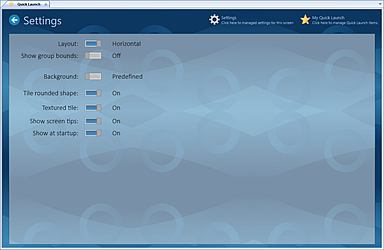
2. Use the “Settings” option to manage the various graphical settings for the screen, such as item orientation, shape, and background texture, as well as whether to show screen tips and the Quick Launch at startup:
3. After configuring the Quick Launch screen, select the back-arrow next to Settings.
After you’ve logged in, you can launch the Quick Launch screen at any time by selecting the option on the Prospero Home ribbon.
A user’s access to the “My Quick Launch” feature is dependent on the permissions defined on the user’s role, their Assignments, as well as whether the user has Visibility to the report or input definition. To add reports, you must be licensed for Prospero reporting or budgeting and reporting. To add input definitions, you must be licensed for Prospero budgeting or budgeting and reporting.
In addition:
•If a user has not been assigned the “run reports” or “view published reports” permissions, the "My Quick Launch" icon in the Profile pane will be disabled. (While the user may select the “Quick Launch” option on the Home ribbon, the link in the dialog will be disabled and the user will not be allowed to add any reports.)
•If a user has not been assigned “input data” permission, the "My Quick Launch" icon in the Profile pane will be disabled. (While the user may select the “Quick Launch” option on the Home ribbon, the link in the dialog will be disabled and the user will not be allowed to add any input definitions.)
•If the user has permissions to “run reports” or “input data”, the “My Quick Launch” icon in the Profile pane will be enabled and the reports listed in the “Quick Launch” dialog will be those to which the user has been granted Visibility to.
•If the user has “view published reports” permission only, the Quick Launch dialog will allow the user to select and display the list of reports to which they have been granted access to via the Visibility option. Selecting the report will open the most recently published version of the report.
Classic Display
Out-of-the-box, new Prospero users will have the graphical option setting for their Quick Launch. (The Use tiled Quick Launch screen option, available in Local Settings Options, controls how the Quick Launch screen is visually rendered in the workspace.)

However, users can select a classic display by de-selecting the Local Settings Option, Use tiled Quick Launch screen. In this instance, the Quick Launch displays in a standard dialog format.

Note: For input definitions or report collections to appear as available items on the Quick Launch you must use the graphical display option. Also, the Quick Launch screen is not available within the System Entity.