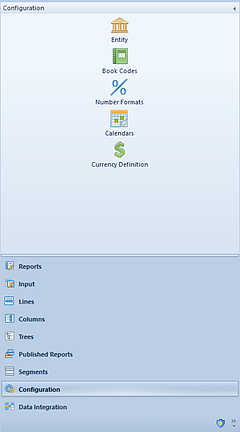
You can manage your entity’s information and options via the Entity Management workspace.
To access the Entity Management workspace:
1. Log in to the entity as an Administrator-level user.
Or, depending on what information and options need to be added or modified, log in to the System Entity. Refer to the options below or contact MSX Support for more information.
2. Click on the Configuration bar in the Prospero Navigation Pane.

3. Click
on the Entity icon to open the Entity Management workspace.

4. The fields and options available from the Entity Management workspace include:
•Entity Code – A code, or ID, which you assign to your Entity.
•Entity Name – The descriptive name which you assign to your Entity
•Administrator Role – The role in Prospero Security which you have designated can create, maintain, or remove Entities in Prospero. The Administrator Role value will default to the user/role creating the Entity.
•Read Only – When checked, this option indicates that the Entity and its’ associated data is only available read-only.
•Inactive – When checked, this option indicates that the Entity and its’ associated data is inactive. The Entity will not be listed for selection at the Prospero login.
•Locked – When checked, this option indicates that the Entity and its’ associated data is locked and cannot be edited. This option allows the Prospero Administrator or other authorized user to prevent users from logging in to the Entity.
The Locked checkbox is not editable from the Entity Management screen. It is marked as checked whenever the “Lock all users out of the system” checkbox is selected on the System Locks and Messages screen.
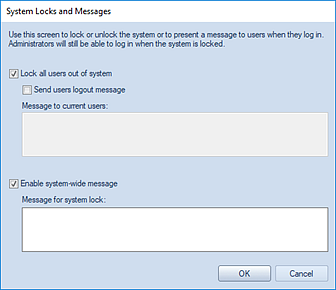
When checked, users will be prevented from logging in and will receive the message specified. If the field is left blank, a standard message that the system is locked will be provided at login.
Any Administrative users will receive the message, but will continue to be able to log into the system.
•Display Message – This option indicates that the user will receive a custom message at the time of login. This option allows the Prospero Administrator or other authorized user to provide informational or other useful massages - such as system maintenance or data updates - to users at log in to the specific Entity.
The Display Message checkbox is not editable from the Entity Management screen. It is marked as checked whenever the “Enable system-system wide” checkbox is selected on the System Locks and Messages screen.

When checked, users will receive the message specified.
•Message – Selecting the ellipsis option will open a System Locks and Messages dialog which allows the Prospero Administrator or other authorized user to enter their specific informational or other useful massage text. Users will be presented with the message either on login or when the Prospero Administrator is required to perform any specific task that requires users to log out of the specific Entity, such as system maintenance or data updates.
•GL Linked – This checkbox indicates that the Entity and its associated data is linked to a General Ledger. (This value can only be changed in the System Entity. You must log in to the System Entity using an ID with permission to maintain entities.)
•GL Linked Name – This option indicates that the name of the associated linked General Ledger.

Where multiple available options
exist, select the ellipsis button to open the Integrations screen:
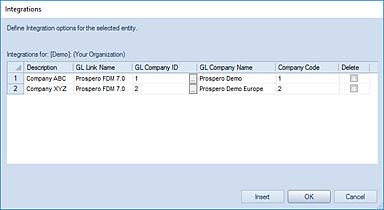
You must log in to the System Entity using an ID with permission to maintain entities to change values in this screen:
o Description – This field shows the description of the integration.
o GL Link Name – This field is the name of the associated linked General Ledger.
o GL Company ID – This field shows the ID of the associated linked General Ledger linked to the Entity.
Select the ellipsis button to
show the underlying linked General Ledger(s) information in the Integrations
screen.
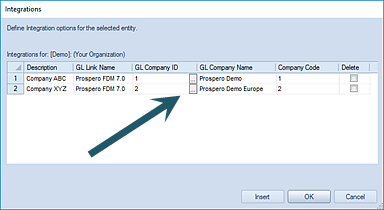
If multiple companies are available for the GL, the ellipsis will then open a dialog of the available companies. This screen will show the company ID and company name:
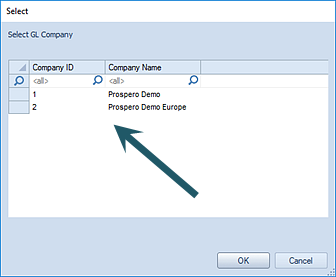
Select one or more and it inserts them into the list.
(This information must be defined in the System Entity.)
o GL Company Name – This field is the company name for the associated linked General Ledger.
o Company Code – This field is the company code for the associated linked General Ledger.
o Delete – Select this checkbox to remove the listed integration. (When the Dialog is closed, the item will then be removed.)
•Default Background Image – This option allows you to select an image to customize the Prospero workspace. Select the ellipsis button in this field to open a Windows selection dialog. You can use .BMP, .JPG, .GIF (not animated) and .PNG file formats.
•Default Currency – This option allows you to select the default currency for Prospero reporting. You must have a valid Prospero license for the Reporting with Currency module to access this feature.
As shown, this option must be set on the System Entity and will be visible read-only for all Administrator-level users on the Entity Management workspace within that entity. The default currency will be indicated on the Currency Definition workspace and will not be editable on that workspace.
•Custom Separator – This option allows you to specify a custom separator – often a dash or dot – to separate segment IDs. This separator is shown on reports where more than one segment is used in a Line Definition and displays in the row segment code in the columns.
•Logo – This option allows you to select an image to display by default on the Prospero client background.
5. Once you’ve completed your update, close the workspace, and, when prompted, Save your modifications.
Note: To manage an entity using Entity Management, you must log in to the System Entity as a Systems Administrator. To view an entity using Entity Management, you must log in using an ID with Administrative permission.
For more information, see the section on Prospero Security Permissions in Security or contact the MSX Group.