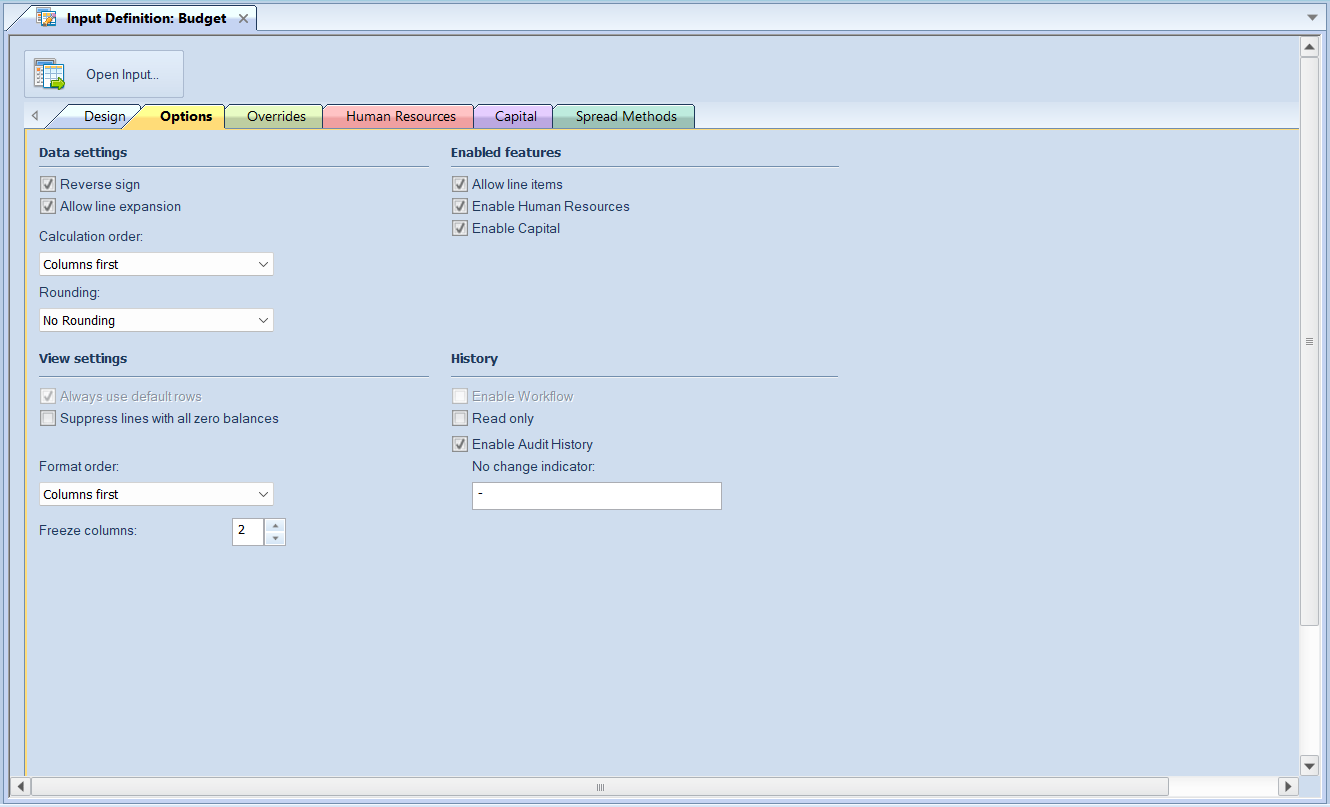
The Input Definition Options tab allows you to define the plan’s data settings.

The available action and items on the Options tab include the following options:
Data settings
•Reverse sign – The Reverse sign checkbox option is used to indicate that you want signs reversed (Credit/Debit) for appropriate natural account items.
Import information to note regarding the Reverse Sign option:
1. If the user checks the Reverse sign checkbox, Prospero automatically reverses the sign based on the account type. (Users can override this easily using a '*-1' formula in the Line or Column Definition. For more information refer to Prospero Calculations.)
2. If the user does not check the Reverse sign checkbox, then the sign is reversed based on if the check box in the Line or Column Definition is selected to reverse the sign. This will occur no matter what the account type is.
•Allow line expansion – The Allow line expansion checkbox allows you to specify whether the lines will be expanded on your Data Input workspace (where the Line Definition uses the Expand feature.)
When checked, if a line set uses the expand feature within it, the expanded rows will be generated with the input definition. If the checkbox is not checked, the expand setting within the line set is ignored and you will not be able to see rows which comprise the summary row which comprise the Expand row.
This option is selected by default.
•Calculation Order – This option specifies the order for calculations to be performed on your plan – either using columns or lines first. The default is “Lines first”.
•Rounding – This option specifies if rounding should occur to the whole number or the decimal precision defined for the Line or Column. Options are “No Rounding” and “Whole Numbers”. The default is “No Rounding”.
View settings
•Suppress lines with all zero balances – The Suppress lines with all zero balances checkbox allows you to specify whether to hide a given row based on the data in it.
•Format Order – This option selects the order for any formatting to be applied to your input definition.
If “Columns first” is selected, the formatting applied to a Column Definition’s column will be applied to first and any Line Definition’s line formatting will be applied – and possibly overwrite the column’s formatting – thereafter. Conversely, the option “Lines first” will apply line and then any column formatting.
The default selection is “Columns first”.
•Freeze columns – Sets the number of columns that will be frozen to the left of the screen (in other words, columns that will not scroll off the screen as you move to the right). You may freeze up to 9 columns. Note: hidden columns need to be counted when freezing columns.
Enabled features
•Allow line items – When checked, this option allows you to enter line items to your account rows in the Data Input workspace. These subordinate rows will then total as part of the main account row.
This option is not selected by default.
•Enable Human Resources – When checked, this option allows you to define Human Resources options and will enable the Human Resources tab in the Data Input workspace.
This option is not selected by default. For more information see the section on the Human Resources tab.
•Enable Capital – When checked, this option allows you to define Capital options and will enable the Capital tab. This option is not selected by default. For more information see the section on the Capital tab.
History
•Enable Workflow – When checked, this option allows you to enable workflow capabilities – task execution and approvals - for your plan. This option is not selected by default.
•Read Only – This option indicates that the Input Definition will be read-only and data will not be able to be input to the plan. This option is not selected by default.
•Enable Audit History – This option indicates that the History option will be enabled on the Input Definition and that changes made to plan data – additions, modifications, or deletions - will be recorded in a History log. This option is not selected by default.
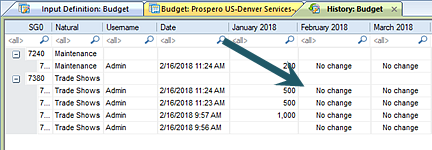
•No change indicator – This option allows you to custom-specify how an entry which has no change to the data will appear in the History screen. For example:

Will appear as follows:

You can specify up to 24 alphanumeric characters as well as special characters such as the “-“. This option is <BLANK> by default.
If you require that your input definition’s options be set at the global-level (i.e. for all Prospero input definitions), these settings can be changed and maintained in Options.