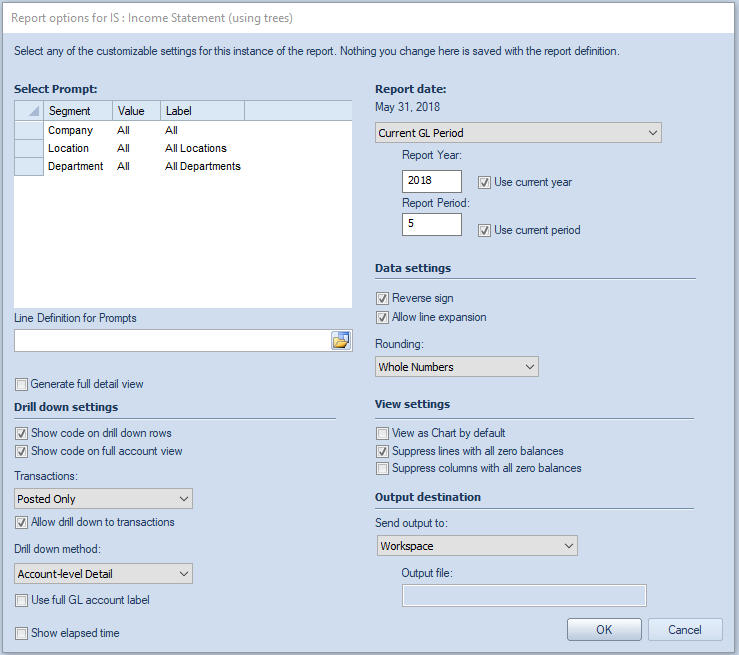
Prospero provides you with the opportunity to set your report options at run time. While report settings can be established on the Report Definition Design and Options tabs, they can be overriden at run time in the event that a different view of the report data is desired.
Report Options allow you to select the parameters for the report as well as report date and data options.
Select Prompt
The Select Prompt section allows you to specify the parameters for your report such as the specific Segment(s) which you wish to use in generating your report.

To select prompts:
1. In the Select Prompt section, click on the available ellipsis button(s) to make your segment selection(s).
If you have not defined any Trees, you will still have the option to use the default “All” option to summarize all items in the segment. The “All” tree item, which summarizes all the items in the segment, is created by default during the Prospero installation and will be a read-only. For more information see System Defined Trees.
2. Select an item from the associated Tree(s).
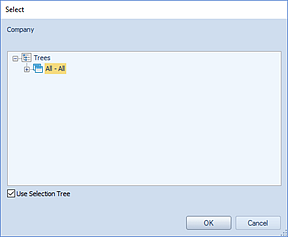
3. Select the Ok button to confirm the selection.
When executing your reports, Prospero will verify that you have the appropriate Permissions and Assignments to execute the report. The prompts which you can select from at runtime will be determined by your Assignments. For more information, refer to Using Multiple Report Prompts and the Invalid Parameter Report Dialog.
For prompt selection using the “Use Selection Tree” option, your valid assignments will appear in normal text in the Select dialog. (Non-assigned items will be grayed out).
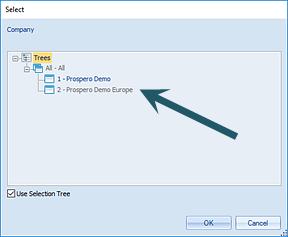
Also, if you are only assigned a subset of Assignments within a segment, the “All” system-defined tree will not be available (i.e. will be grayed-out). However, the elements what comprise that assigned subset will be available.
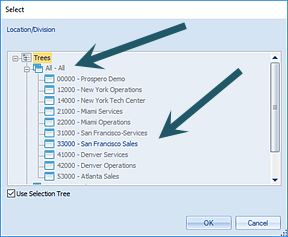
You can select a segment value for which you are not assigned, when using the “Use Selection Tree” option. However, if you select a prompt for which you do not have Assignments, when you select the Ok button you will receive an error message:
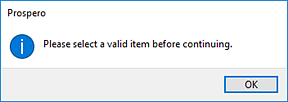
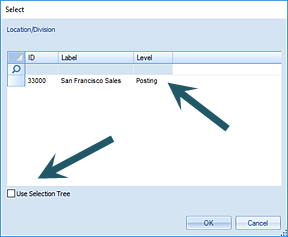
For prompt selection
not using the “Use Selection Tree” option, you will see
only the associated segment values to which you have been granted access
in your Assignments. (You can also type in a value next to the magnifying glass
to quickly select a value, again, if you have been granted access via your
Assignments. However, if you type a value which does not exist, you will receive
a message “No items match your filter.”)
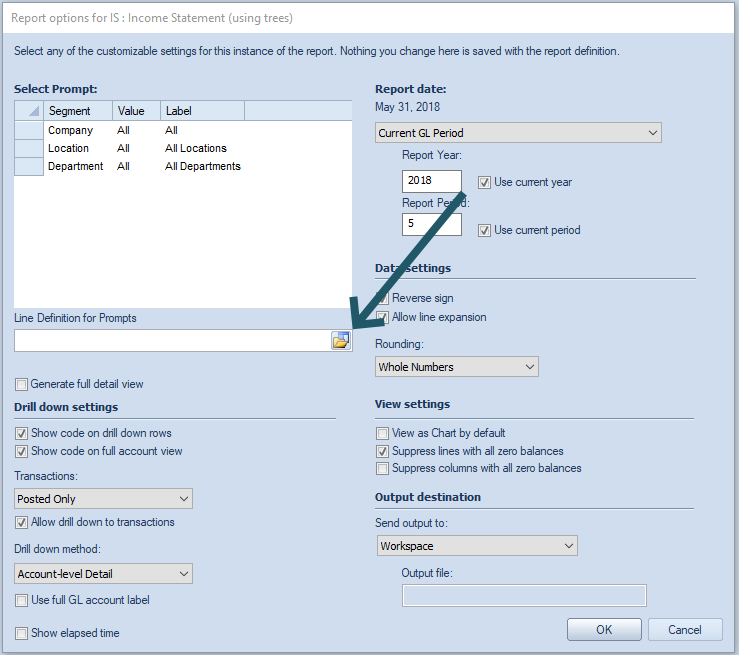
Line Definition for Prompts
The Line Definition for Prompt option allows you to specify the prompts for your report using a Line Definition. This must be an existing Line Definition with all associated segments defined.
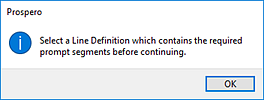
The Line Definition used must contain valid Segment criteria for all of the segments used by the report.
If the Line Definition does not contain valid criteria for all of the segments which require a prompt, you will receive the following error message and the report will not execute:
Lastly, whenever the Line Definition for Prompts is defined any settings in the Select Prompt section will be ignored:
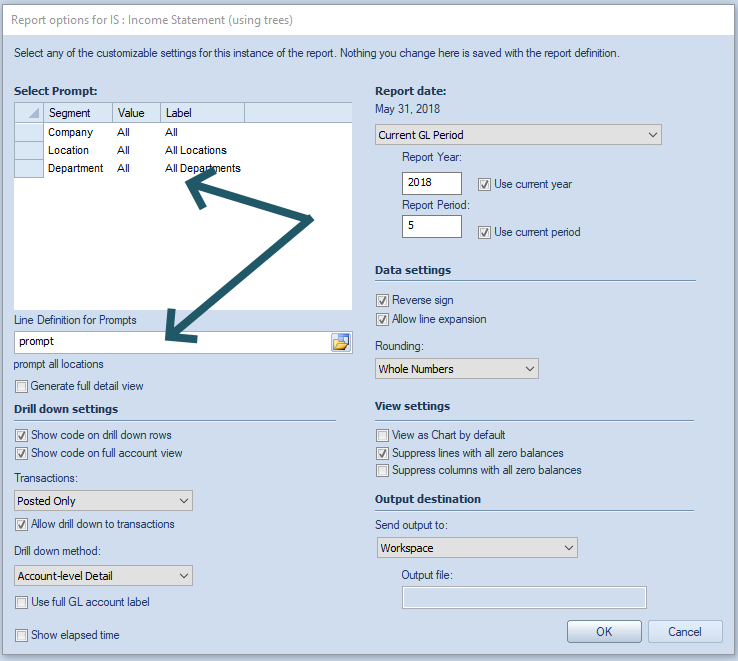
For more information refer to the sections Using Line Definitions for Prompts and Creating Line Definitions for Prompts.
•Generate full detail view – When this option is selected, Prospero
will generate the requested report as it is defined and will also generate the
full detail view along with it (at the same time).
Note:
Generating the full detail view can take a significant amount of time to
complete and any report that does not include a segment in the column definition
can have the detail view generated via the workspace ribbon button when needed.
ONLY select this checkbox if you need the detail view to be rendered at the same
time as the regular report output is rendered.
Drill down settings
•Show code on drill down rows – Allows you to choose to show the code on the row when drilling down on report rows. The code value will be appended to the description. This setting will default to what is set on the Report Definition.
•Show code on full account view – Allows you to choose to show the code on the rows on the Full Account Detail View. The code value will be appended to the description. This option will default to what is set on the Report Definition .
•Transactions – Allows you to define the type of transactions returned by the drill down method on your report:
o None – Returns no transactions on drill down.
o Posted only – Returns only posted transactions.
o Unposted only – Returns only unposted transactions.
o Both – Returns both posted and unposted transactions.
If you have selected “None”, the “Allow drill down to transactions” checkbox will be unavailable and unchecked. When you drill down to the posting level you will receive the following message:
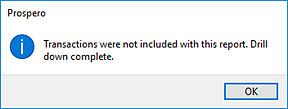
The default is “Posted only”.
•Allow drill down to transactions – When checked, this option allows report drill down to view the underlying transactions. Otherwise, drill down will not allow transactions to be shown on drill down.
If the “Allow drill down to transactions” checkbox is unchecked (or unavailable where Transactions = None), you will receive the following message when you reach the posting level:

This option is unchecked by default.
•Drill down method – Allows you to define the drill down method your report will use:
o Reporting Tree Levels – Uses the standard Prospero Tree method for drill down which drills through each level of the tree associated to the report to the transaction level (if specified). This option is the Prospero default drill down method.
o Account-level Detail – Uses a drill down method which is a non-subtotaling method and which will only drill down to the report account lines.
o Mixed – This value indicates that the report will switch from Reporting Tree Levels to Account-level Detail at some point in the drill down order. Note: Selecting this option on the Report Run Time Options will result in the drill down behavior defined in the report definition.
•Use full GL account label – When checked, this indicates that the full account label from the GL will be reflected on the account -level detail. If this item is unchecked, account-level detail will reflect what has been previously brought in to the system through the integration. This setting will default to what is set on the Report Definition.
Note: This option is only available for GL integrations supporting this information.
View settings
•View as Chart by default – The View as Chart by default checkbox allows you to specify at runtime whether to render the report to the workspace as a chart or graph.
•Suppress lines with all zero balances – The Suppress lines with all zero balances checkbox allows you to specify whether to hide a given row based on the data in it.
•Suppress columns with all zero balances – The Suppress columns with all zero balances checkbox allows you to specify whether to hide a given column based on the data in it.
•Show elapsed time – Select this checkbox to show the amount of
time the report took to execute. You will receive a message once the report
execution completes.
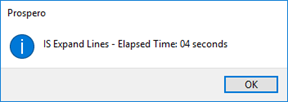
Report Date
•Report Date – This value is inherited from the Report Definition Design Tab. However, you can also select from the drop-down menu to modify the report’s date option:
o Current GL Period – This option will use the current GL period. Selecting this item will also check both the “Use current year” and “Use current period” checkboxes.
o Last Closed GL Period - This option will use the GL's current period minus one month.
o System Date – This option will use the computer’s current date.
o Last Period - This option will use the computer's current date minus one month.
o Custom – This option allows you to enter a custom date for both the “Report Year” and “Report Period” fields.
Note: The date specifications will show as the date for “Report Date” which appears next to the Run Report button on the Report Definitions Design Tab. This period end date value will also appear on the report’s runtime options dialog.
•Report Year – Enter a report year value or select the Use current year checkbox to automatically default to the current GL year.
You can type a value directly to the field which will set the Report Date type to “Custom. Also, whenever the Report Date field is “Current GL Period”, making any modification to the Report Year or Report Period will result in the Use current year checkbox to unchecked.
•Report Period – Enter a report period value or select the Use current period checkbox to automatically default to the current calendar month.
You can type a value directly to the field which will set the Report Date type to “Custom. Also, whenever the Report Date field is “Current GL Period”, making any modification to the Report Year or Report Period will result in the Use current period checkbox to unchecked.
Data settings
•Reverse sign – The Reverse Sign checkbox option is used to indicate on your reports that you want signs reversed (Credit/Debit) for appropriate natural account items.
Import information to note regarding the Reverse Sign option:
1. If the user checks the Reverse sign checkbox, Prospero automatically reverses the sign based on the account type. (Users can override this easily using a '*-1' formula. For more information refer to the section on Prospero Calculations.)
2. If the user does not check the Reverse sign checkbox, then the sign is reversed based on if the check box in the Line or Column Definition is selected to reverse the sign. This will occur no matter what the account type is.
•Allow line expansion – The Allow line expansion checkbox allows you to specify whether the lines will be expanded on a report where that feature is used in a line definition. (If the Line Definition does not have expanded lines defined, this option will not be available and the checkbox will be disabled.)
When checked, if a line set uses the expand feature within it, the expanded rows will be generated with the report. If the checkbox is not checked, the expand setting within the line set is ignored.
•Rounding – This option specifies if rounding should occur to the whole number or the decimal precision defined for the Line or Column. Options are:
o No Rounding – Numbers will not be rounded and will show the number’s decimal precision.
o Whole Numbers – Numbers will be rounded and will show no decimal precision.
o Thousands – Numbers will show in the thousands and the number’s full decimal precision.
o Whole Thousands – Numbers will show in the thousands and will show no decimal precision.
o Millions – Numbers will show in the millions and the number’s full decimal precision.
o Whole Millions – Numbers will show in the millions and will show no decimal precision.
The default setting is “No Rounding”.
Output destination
The Output destination option allows you to choose where to show or port your Prospero reports. Options are:
•Workspace – This option allows you to show the report in the Prospero workspace. This option is selected by default in the dropdown. After that, you can print the report using standard print options.
•Printer – This option allows you to print your report directly to your default printer.
•Microsoft Excel – This option allows you to export your report to a Microsoft Excel worksheet output file. When you select this option, the Output file field will activate to allow you to select an Excel file to use.
•PDF – This option allows you to export your report to a PDF output file. When you select this option, the Output file field will activate to allow you to select file name.
•Published Report – This option allows you to export your report directly to a published report. The folder location of the published report will be that which is specified in the Default Published Report Folder as defined on the Report Definition Output Tab.
If you do not specify a valid output path (file name and location) when running reports that output to either an Excel or PDF file, a dialog will open which will allow you to specify this information using the Save As option.
After selecting your report options, click the OK button to execute your report.
If you have made any change to the report definition or report elements, you will be prompted to Save as follows:

If you elect not to show this message again, you can re-enable this prompt message from the Options screen.
When your report executes, if no data is available for the report prompt criteria you selected, you will receive a message to the effect:
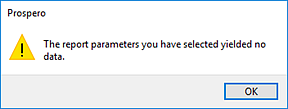
When your report executes, if the report fails for any other reason, you will receive a separate message indicating the cause of the failure.
If you require any of your options be set at the global-level (i.e. for all your Prospero reports), these settings can be changed and maintained in Report Default Options by your Prospero Administrator.
Note: When running reports, Prospero will detect if there are unsaved changes on the Line or Column Definitions and will prompt to save the changes. Prospero will also check for changes to the Report Definition and prompt you that changes will not appear on the report output without saving the definition. Also, any pending change that can be overridden on the runtime options screen will not save on the Report Definition. And, any changes which cannot be set on the runtime options screen - such as chart options, headers/footers, or page layouts - will only appear on the executed report when the Report Definition is saved.