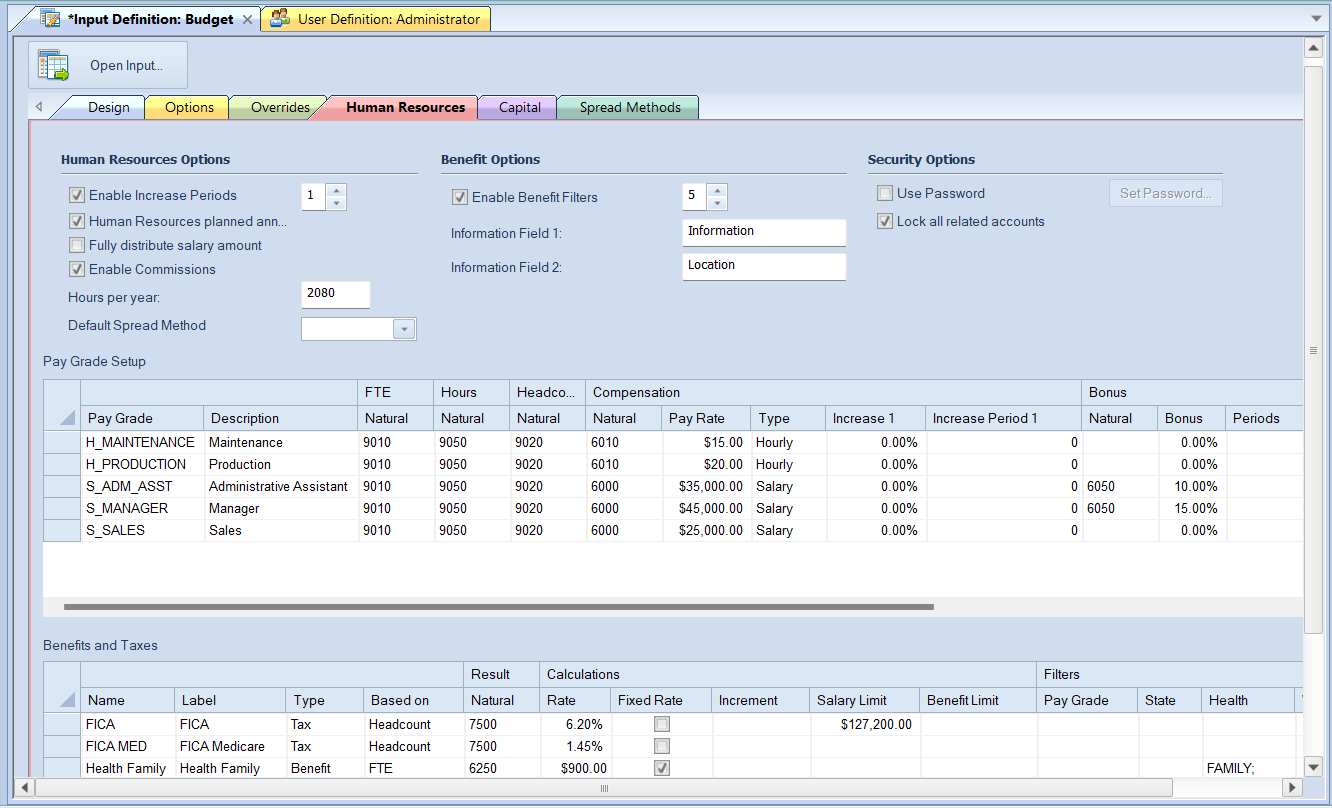
You will use the Human Resources tab in your Input Definition to define the human resources parameters for budgeting employee salary, benefits, or other human resources data in Prospero. These settings control and manage the HR data input in the budget’s Data Input workspace.

Note: To enable input for Human Resources data, you must use a Column Definition which has at least one column marked as a Detail period. Otherwise, the HR tab on data input will be read-only.
This section will detail how you’ll establish various Human Resources parameter elements, such as Pay Types, Taxes, or Benefits. Options includes the following:
Human Resources options
•Enable Increase Periods – This checkbox option allows you to define the associated increases (using a numeric value of 1 or greater) in which can occur. Each Pay Grade in the Pay Grade Setup grid will then have that number of associated columns for each of the periods defined (Period 1, Period 2, etc.):
o Increase n – In this column, enter the percentage increase to apply to the Pay Rate. The default value is 0.0%.
o Increase Period n – In this column, enter a numeric value representing the month for which the increase will be applied. For example, “11” would indicate to apply the increase percentage as of November. The default value is <Blank>.
You can enter a numeric value or use the incrementor to define your numeric value. The default value is 1. This checkbox is checked by default with an option of “1”. (If this option is unchecked, there are no increases to be applied in your Pay Grade Setup grid.)
•Human Resources planned annually – The Human Resources planned annually checkbox option is used to indicate that you want to plan Human Resources activities on an annual basis, not monthly.
When the "Human Resources planned annually" checkbox is unchecked, when the Human Resources tab is selected from the Input Data workspace, individual periods will be shown for manual data entry. The periods shown will correspond to those in the column definition where a Book Code and Year is open for input.

Start and end period fields will be hidden if monthly entry is enabled and will be visible if the entry is being done on an annual basis.
This option is selected by default.
•Enable Commissions – This checkbox option allows you to define commissions associated to your Pay Grade. When checked, the following columns are enabled for your Pay Grade:
o Revenue Account – This account is associated to the amount of commission to apply to the employee. This can be a summary or posting level account. The default value is <BLANK>.
o Commission Account – This is the account that receives the commission dollars when they are calculated. This must be a posting level account. The default value is <BLANK>.
o Commission Rate – The default percentage used to calculate to the commission. The default value is 0.00%.
If the checkbox is not checked, you will not see commission fields.
•Lock all related accounts – This option allows you to manage manual data entry to Human Resources accounts:
o When checked, this option will not allow data entry to Human Resources accounts, even where no employees are defined for the department. When employees are added, the HR calculation process will automatically calculate the resulting accounts for any employees added.
o When unchecked, data entry is allowed and Benefit and Tax accounts will be unlocked only if no employees have been added. In addition, all other Human Resources accounts will remain unlocked as long as there are no employees associated to the pay grades that use those accounts.
The default option setting is checked.
•Hours per year – This is a numeric value which allows you to define the number of hours that your company defines for its standard year.
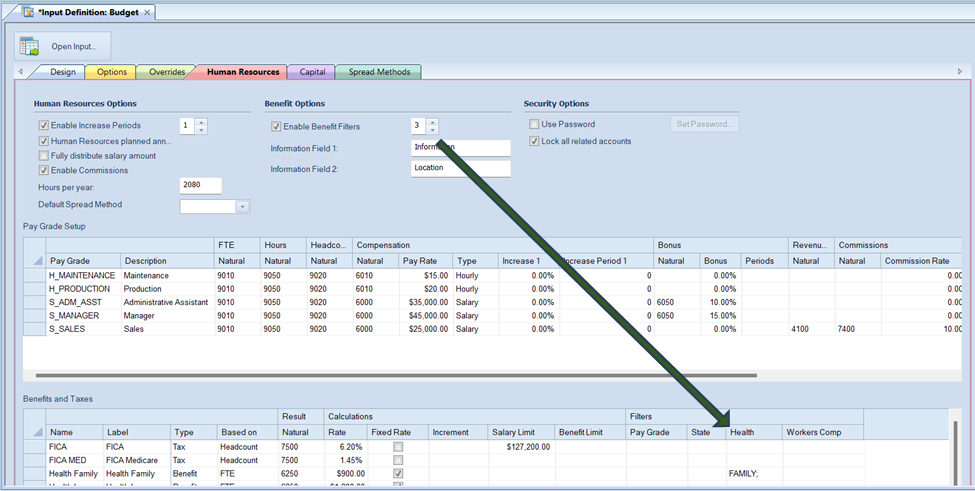
•Enable Benefit filters – This option allows you to define the number of filters to apply to each benefit or tax defined in the Benefits and Taxes grid. For each tax or benefit record, these filter types will be available.
Use a numeric value of 1 or greater for the number you wish to define. Each tax or benefit defined in the Benefit and Taxes grid will have the associated columns available for customization. For example, your grid could appear as the following where you have defined “State”, “Health Insurance”, “User Field 3”, etc., as a value.

Filter values are user-defined and you can define an unlimited number of unique values. Enter a numeric value or use the incrementor to define your numeric value. The default value is 1.
If you define this option as “0” it will indicate that there are no filters to be available for input in your Benefits and Taxes grid.
•Information fields – Prospero provides two informational fields – Information Field 1 and Information Field 2 - on the HR Setup screen. These fields allow Administrators to define what information fields are defined in the input definition. In addition:
o Fields are a maximum of 24 character, can be imported, and are for informational use only. (No calculations may reference these values.)
o If the field name is <BLANK>, a value is not shown on the Data Input workspace. When a value is provided, the label is displayed in the "Reference" section of the Data Input workspace.

The default values are "Information" and "Location", respectively.
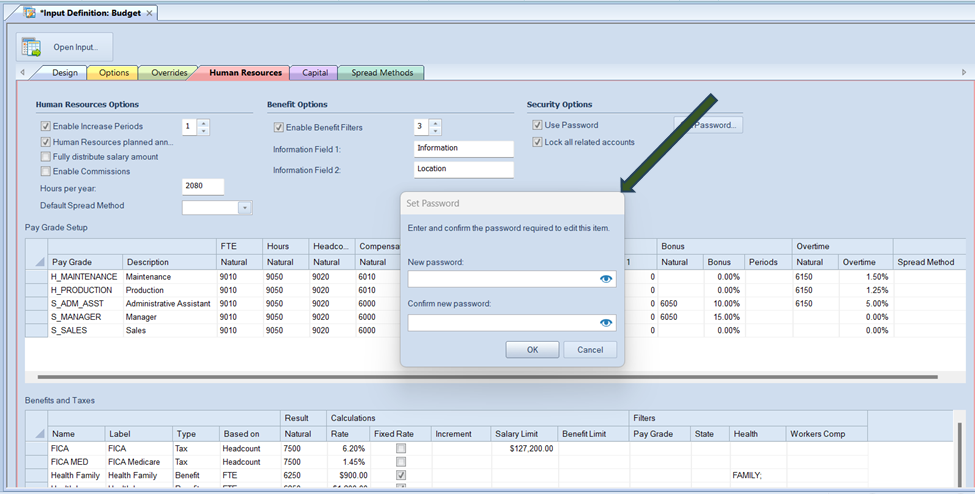
•Use Password – This option allows you to define a password that non-administrators must supply in order to gain access to the Human Resources Input screen when budgeting. If the user fails to enter the correct password for Human Resources, the Human Resources tab will not be available to them, even if their security permissions are set up to allow them to see it.

To use this feature, check the Use Password checkbox and then click the Set Password button. Enter and confirm a password and click OK. Upon saving the Input Definition, this password will now be required for any non-administrators who have Human Resources permissions.
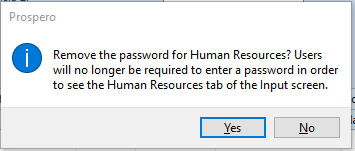
To clear the password and disable
this feature, uncheck the Use Password checkbox. You will be prompted to
confirm this change:
NOTE: Administrators will not be required to enter this password upon opening an Input Screen.
For information on adding Pay Grades and Benefits and Taxes, refer to those sections.